
Ever since the dawn of time, people have been using GitHub to collaborate on open source projects. It's a great way to share code, and to get feedback on your work. This often needs a good way to recognize and reward contributors, and that's where Holopin comes in.
What are digital badges?
Digital badges are visual representations of achievements or skills. They could be earned by completing courses, participating in events, contributing to open source projects, or anything really.
They can be used as a tool for motivation and learning, and can be used to track progress and achievements. They can even be used to stand out in a competitive job market.
How do digital badges help?
Digital badges are a great way to recognize and reward open source contributors. They can be used to motivate contributors to continue contributing, and can be used to track progress and achievements.
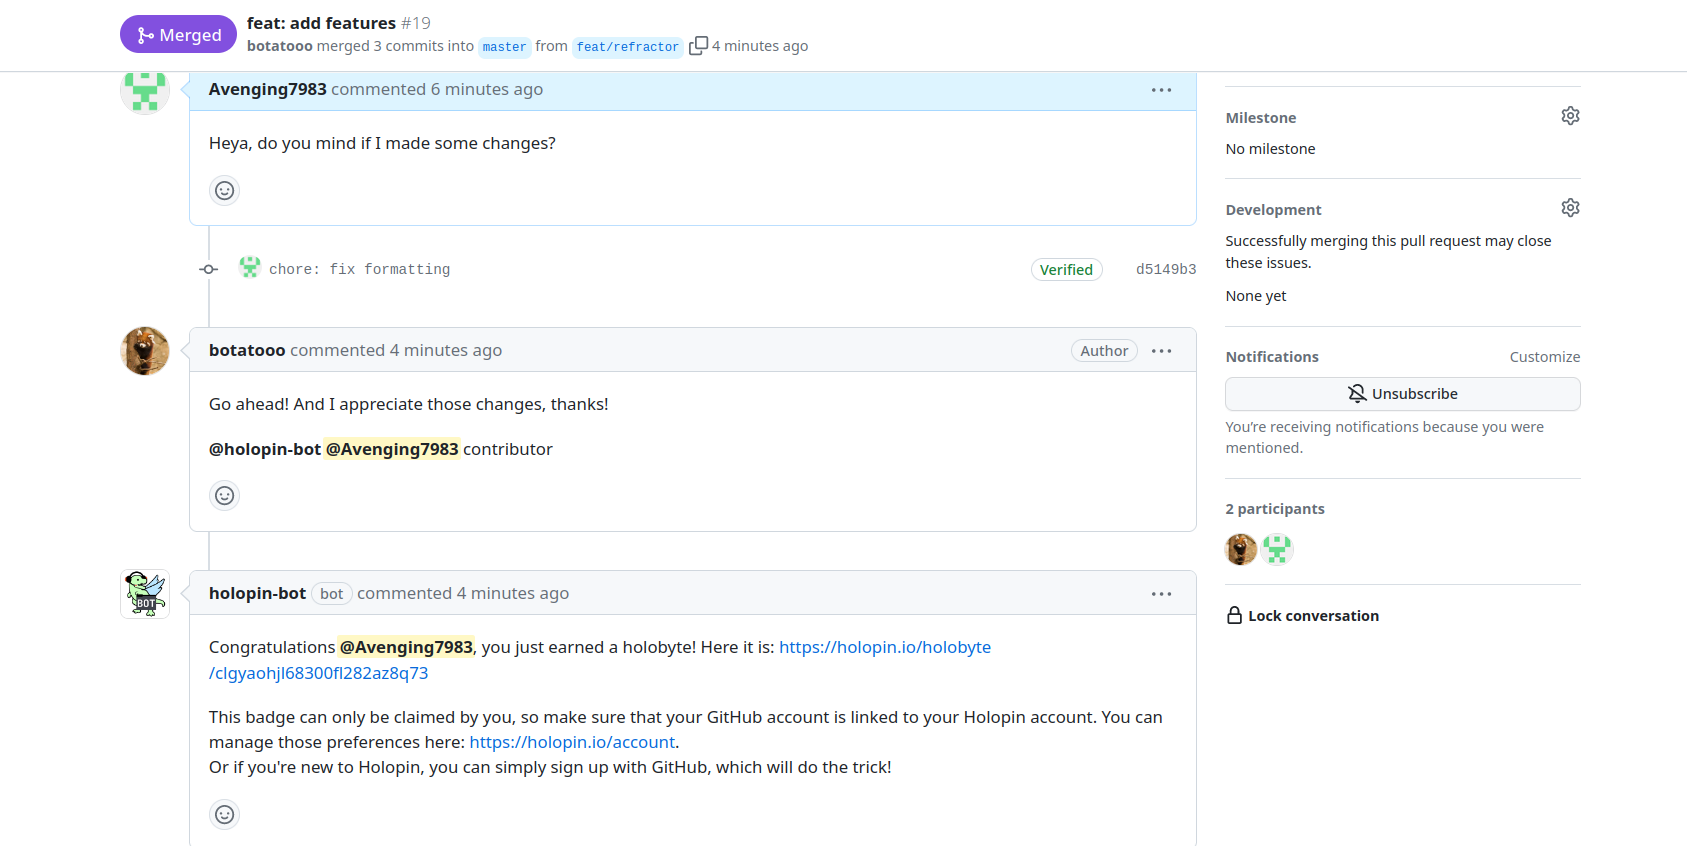
If you ever feel like a whole badge is too much, you can also award Holobytes, which are smaller, more granular rewards. You can use Holobytes to reward contributors for smaller contributions, or to reward them for completing a task. You can even combine both of them in an evolving sticker!
How to use Holopin on GitHub
1. Prerequisites
Before diving in, you'll need to make sure you have a few things ready:
- A Holopin account
- A GitHub account
- GitHub connected to your Holopin account: you can do this by going to your accounts page and clicking the "Authorize" button next to GitHub.
- A Holopin organization: you can get one here
- A digital badge: you can create one by going to your organizations page and clicking the "Create Badge" button next to the organization you want to use.
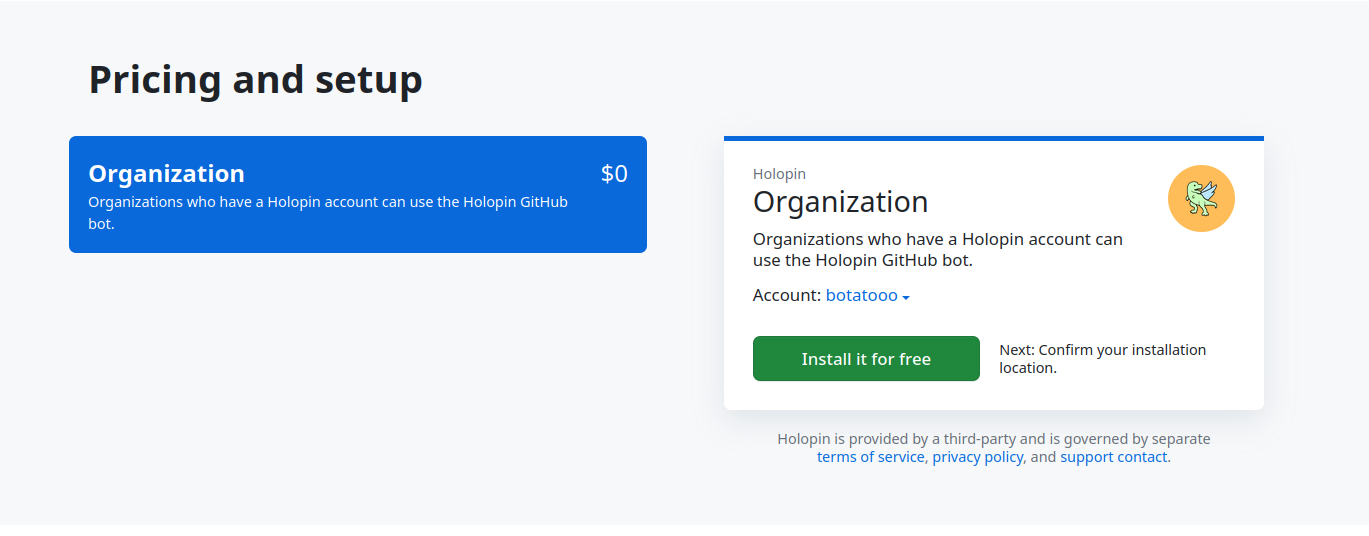
2. Installing the GitHub integration
To get started, you'll want to head over to the GitHub marketplace and install the Holopin app. To do this, you'll want to select the account you want to install Holopin on, and then click "Install it for free".
3. Configuring it
Once you've got it installed, you'll want to head over to your repository and create a .github/holopin.yml file. This is where your configuration lives.
Here's what a complete config file looks like:
organization: holopin
defaultSticker: cl7td8iq6014809k0mf12i1e6
stickers:
  - id: cl7td8iq6014809k0mf12i1e6
    alias: deserves-badges
holobytes:
  - alias: cookie
    icon: cherry
Don't worry if it looks threatning, we'll walk through each item step by step.
Organization
organization: holopin
This is the username of the organization you're awarding from. In this case, it's holopin. It's usually shown as smaller and darker-colored, without any spaces between words.
Default sticker
defaultSticker: cl7td8iq6014809k0mf12i1e6
This is the badge (or sticker) you want to award by default. This means that, in case it doesn't recognize an alias (we'll go over what this is later), or none is provided, it will award this sticker. You can find the sticker's ID by going to the sticker's page on Holopin, and copying the ID from the URL.
Stickers
This is a list of stickers you want to award.
stickers:
  - id: cl7td8iq6014809k0mf12i1e6
    alias: deserves-badges
  # etc, feel free to get creative
Each sticker has an id and an alias. The id is self explanatory, and the alias is the name you want to use when awarding it. Same as before, you can find the sticker's ID by going to the sticker's page on Holopin, and copying the ID from the URL. Both of these options are required for each item in the list.
Since this is YAML, you'll need to add a - before each item in the list. You can also add comments with #.
Holobytes
holobytes:
  - alias: cookie
    icon: cherry
This is also a list. The only item that's required here is alias, which we've already covered. The icon is the icon you want to use for the Holobyte (by default it's cherry, but it can be one of the following: avocado, starfruit, coffee, or lemon)
There's also evolvingStickerId, which you can use to link the holobyte to an evolving sticker (an evolving sticker is a type of badge that evolves with each holobyte, of which you can decide how many are needed for an evolution), so that the holobyte can count towards the sticker's evolution. This is optional, and if you don't want to use it, you can leave it out too.
These last two are similar, but not quite the same (they're also optional!) from is a boolean, and when set to true, will include the user who awarded the Holobyte in its message.

in is also a boolean, but instead includes the repository the Holobyte was awarded in, and links to the issue/pull request.

Conclusion
Digital badges are great, and Holobytes are even better. We're excited to see what you do with them, and we hope you enjoy using them as much as we do. If you have any questions, feel free to reach out to us on Twitter or by email at support@holopin.io.
